Saturday, October 31, 2015

Pumpkin String Art with Push Pins!

I was in charge of the craft for Mya's class Halloween party, so I was looking to do something unique with her class of 3rd graders!  I have tried out the string art using nails and wood, but I knew that would not work in the 15 minute time slot we had (not to mention the cost and skill level it would require!).  So.....I came up with an alternative! Here is Mya's:

The kids loved making these and it was a huge success!!
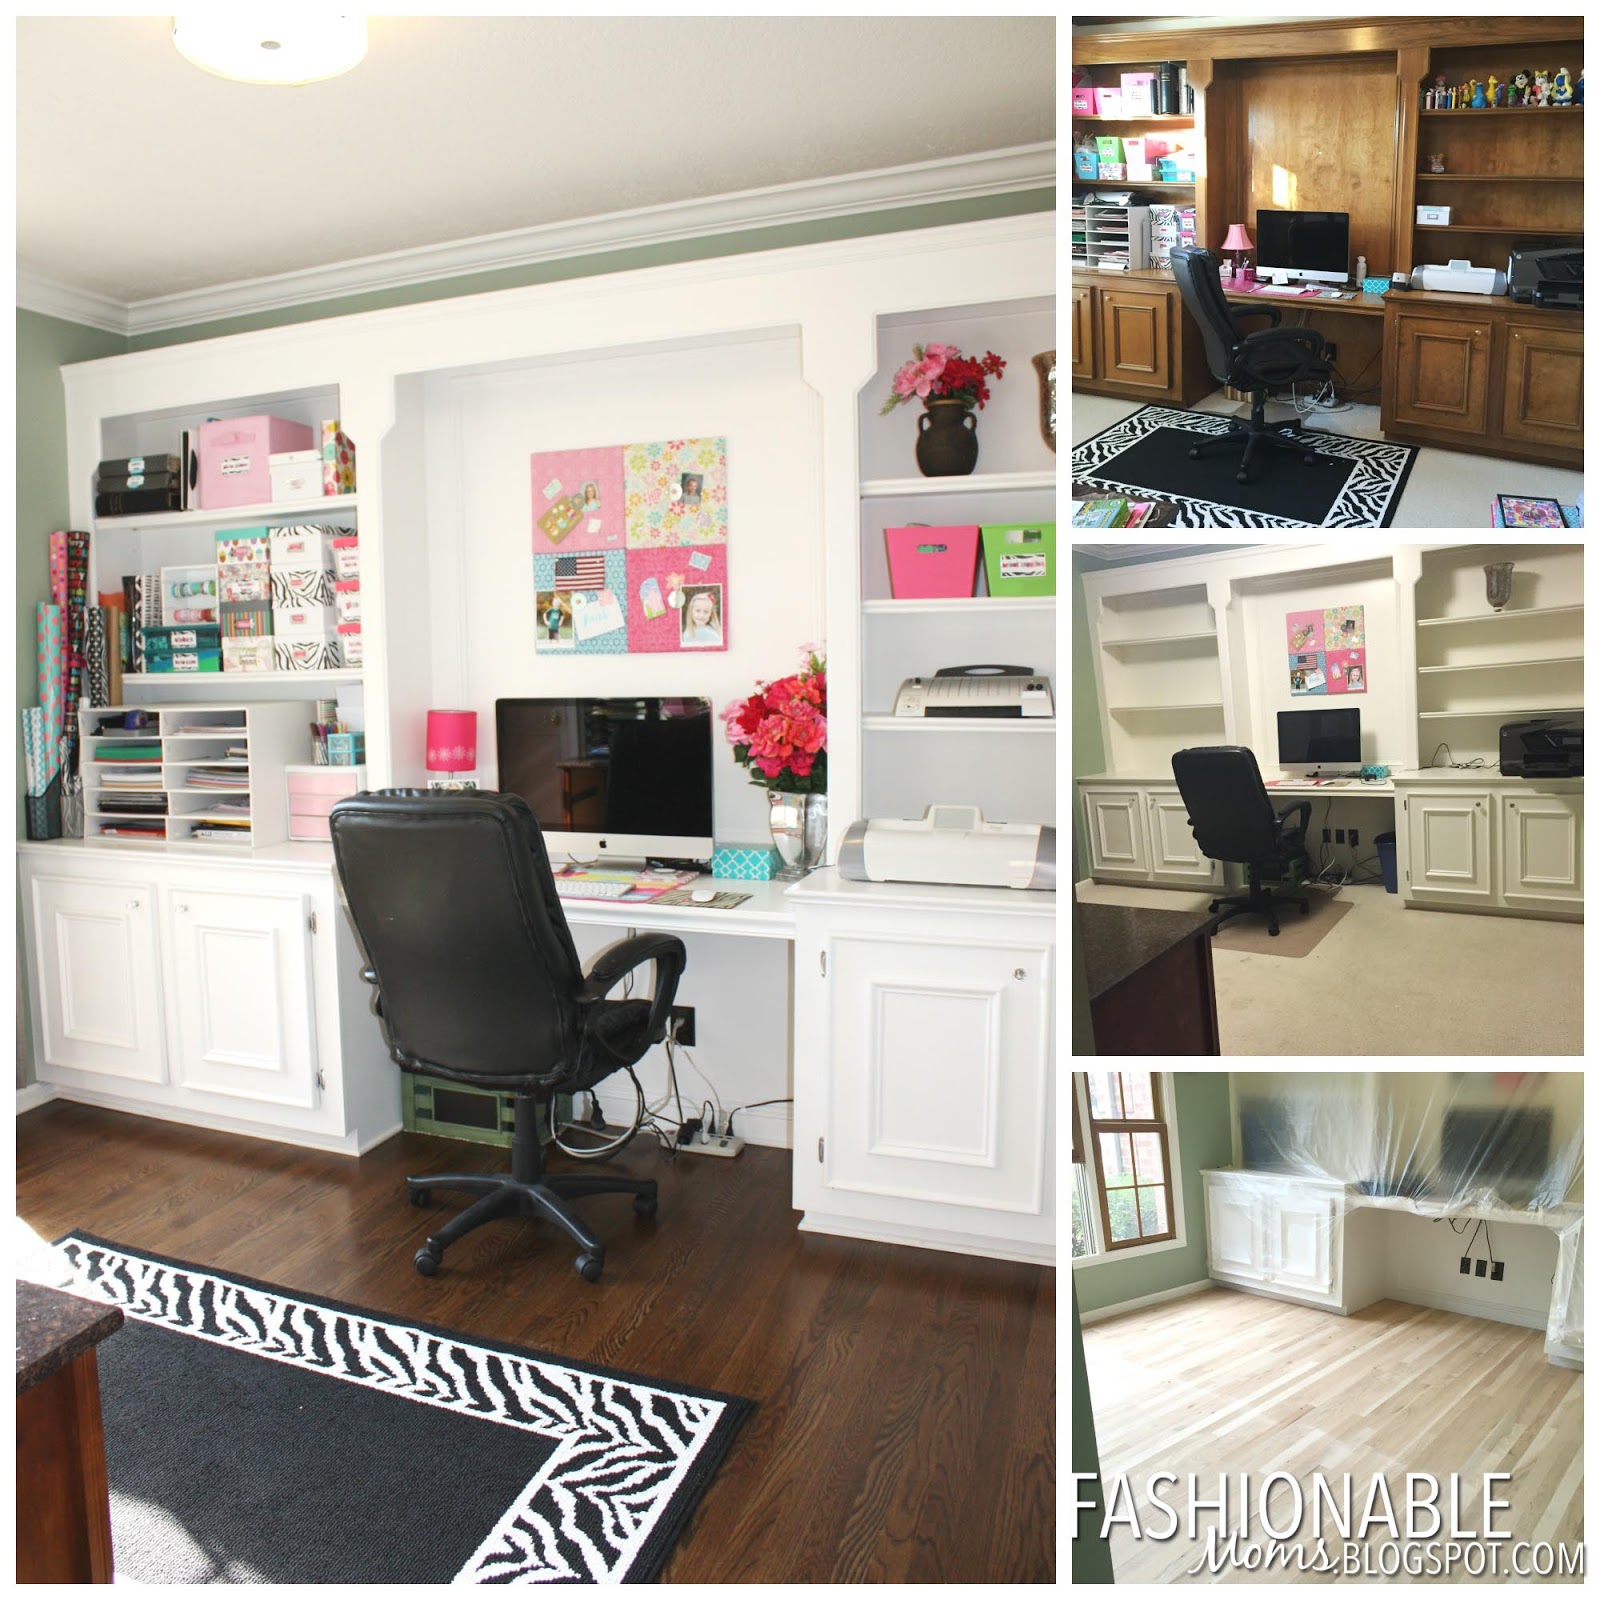
Here is my original version:


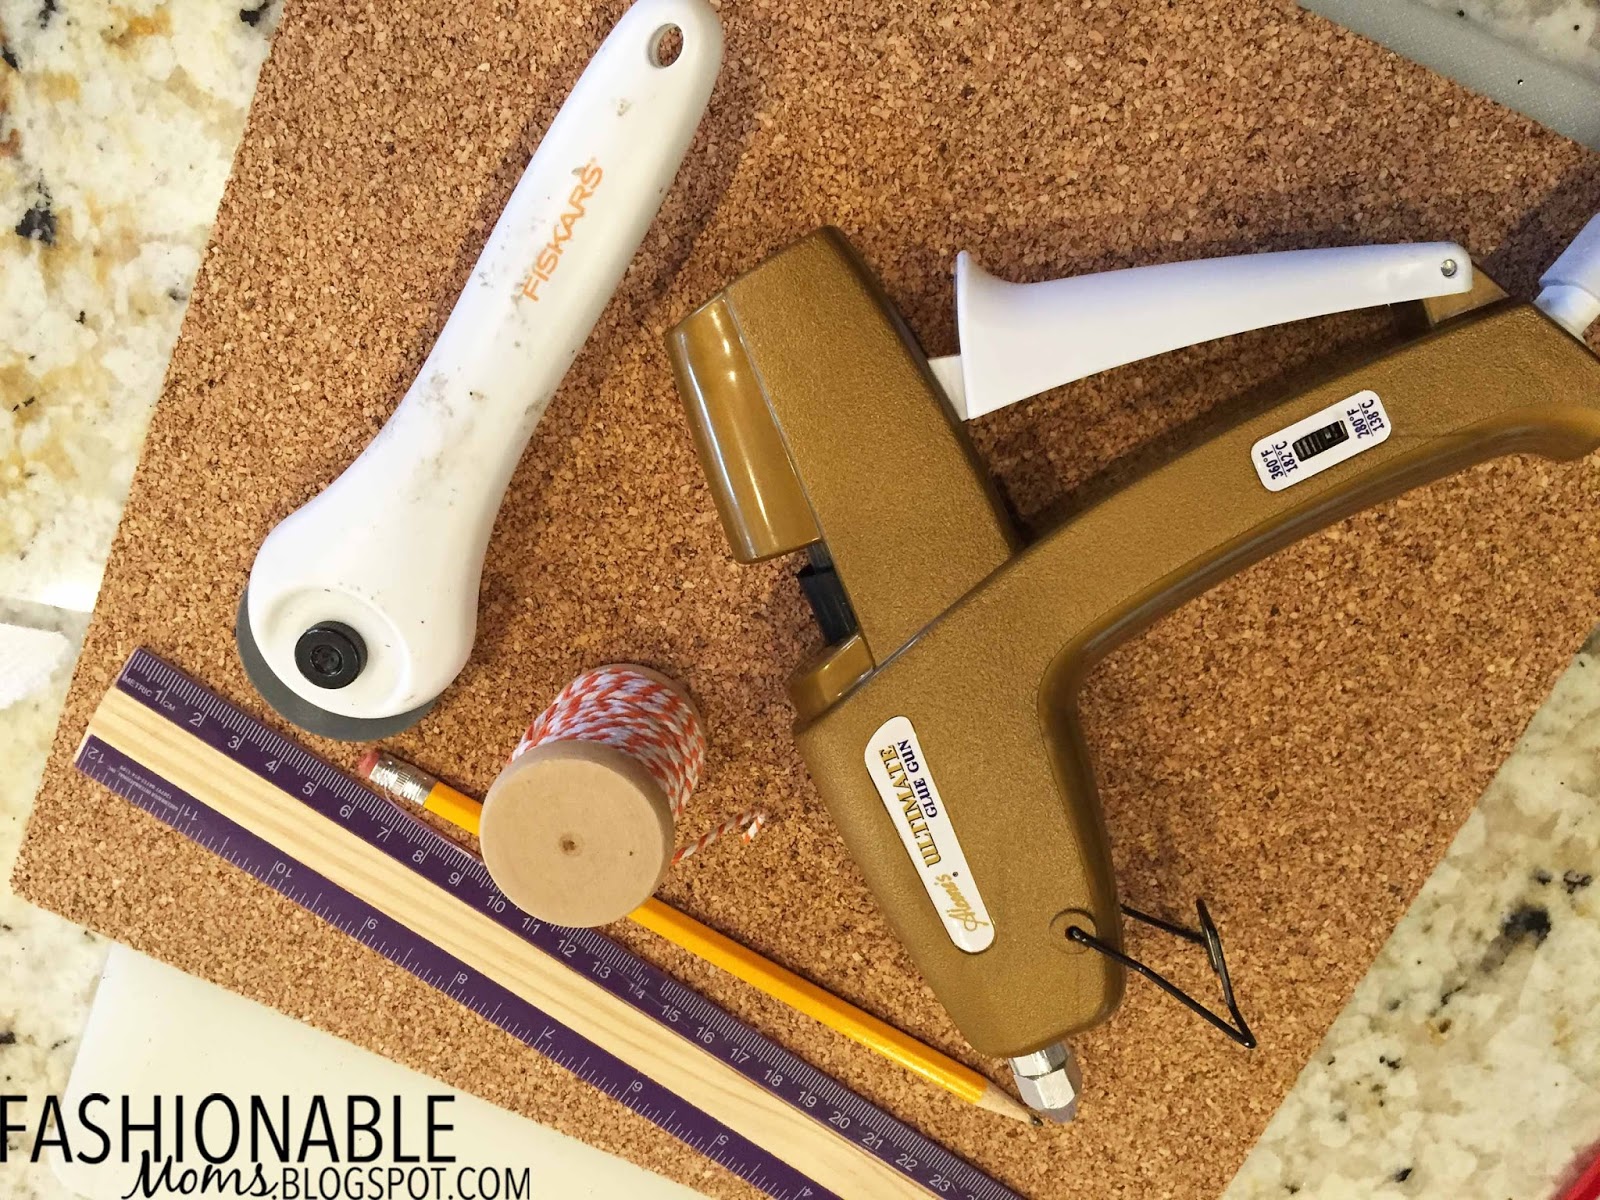
I prepared all the supplies ahead of time, which was very time-consuming, but made things run very smoothly at the class party.  Here is a list of the supplies needed:
Green push pins
Ribbon or string for hanging
Pumpkin cut-out
Glue gun and glue sticks
Ruler & pencil
Knife or cutter


I cut out 6x4" rectangles for our project.  


Use the glue gun to glue two layers of cork together, with the hanging string or ribbon glued between the layers.  It is necessary to glue two pieces together so it's thick enough for the push-pins to go in but not push all the way through.


I prepared the boards ahead of time and gave each child a bag with the supplies he/she needed for the project: pumpkin cut-out, 16 clear push pins, 4 green push pins, string.  I also glued each end of the string with a glob of hot glue to make the ends strong so the kids could simply poke the push pin into the string's beginning to start out and then again at the end.  No need to tie the string around the push pins!!


The pumpkin shape will be removed after the push pins, so be sure the kids are poking the push pins outside of it, not through it!!


Lift up a push pin and push it through the beginning of the string.  Then just randomly wrap the string  in any pattern you choose!!  Mya chose to wrap a border on the top part of the pins then the remaining string under the push pins, but you can also weave it all on the top part, as in my original version.

Use the green pins for the "stem" or you can use green string as in my original version.


Happy Halloween!!

post signature

Saturday, October 24, 2015

Free Printable: Halloween Banner Flags!

Happy weekend everyone!!!  It's not too late to add a little more Halloween decor around the house!  Enjoy this free printable Halloween Banner!!!  Print, cut out flags, punch holes, and add a ribbon to hang!


Created by Jamie/fashionablemoms.blogspot.com.
Clipart and backgrounds from my favorite shops:
https://www.prettygrafik.com
https://www.etsy.com/shop/WinchesterLambourne
https://www.etsy.com/shop/SonyaDeHartDesign
post signature

Thursday, October 22, 2015

Home Office: Before & After


Woooohooo! The floors are done!  All the installing, sanding, and staining is done and our furniture is back in!! We still have some pictures to hang and other "stuff" to put back, but we're taking our time on that.  I'm not going to go into all the details of our whole floor process in this post because I think it needs a separate post of its own!!! I have several before and after pictures to share, as well as tips and advice for anyone thinking about replacing carpet with wood floors.

I've decided to start off sharing the room in our house that has had one of the biggest transformations since we moved into this home in May 2013.  It's my craft room/home office/homework room/art gallery!!!!!  I don't spend a lot of chunks of time in here, but I do come in here very frequently for craft supplies, printing, using my Cricut or laminator, etc.

BEFORE: The builtins were still the natural wood color, and there was berber carpet.

The middle pic is after we had the trim and builtins painted white and the last pic is obviously the final "AFTER" pic:


I have shared that I tend to be messy and unorganized much of the time!!!  I always feel that my life is in fast-forward mode, so I'm always moving from one project to the next, leaving messes behind!  Well, this system of using the shoeboxes to store my most frequently used supplies has been fabulous!!!!!!  It's one of the few organizing systems that has actually worked for me and the shelf always stays tidy! Yay!!!!

The art gallery wall is a work in progress. I just LOVE seeing the kids' projects and paintings and drawings and masterpieces;)  I've got a whole bin of artwork to sort through and hang up there.  (I have difficulty throwing that kinda stuff away, so it's been a challenging process deciding what to toss, store, or hang!)

There is another wall/section of this room that I didn't photograph.  It's Mya's desk and a small closet I use for my Mary Kay inventory.  It's pretty boring, but I may show some pics at some point in the near future!
:)Jamie


post signature

Saturday, October 17, 2015

Free Printable: Costume Contest Certificate!

Halloween is just a couple weeks away and my kids don't even have their costumes yet...yikes!!!! We finally were able to get back into our house last night after having been away for 5 days because our new floors were getting installed.  I am SO EXCITED to do a special blog post with before & after pics next week when our furniture is allowed back in! ;)  
Anyway....here is a FREE printable Costume Contest Certificate I'm happy to share!  I also have a few in my shop.  Use coupon code TAKE2 for $2.00 off.
Enjoy!

[updated 10.12.2018]


In order to keep these printables FREE, I do not offer customization.  Please visit my Etsy shop for custom order inquiries and price quotes!


For your personal use only.  Professional printing okay.

Jamie My Fashionable Designs
Etsy | Blog | Facebook | Instagram 


Here is a sneak peek at our new floors;)


Clipart & images from my favorite shops:
Background--> https://www.etsy.com/shop/Prettygrafikdesign 
Clipart--> https://www.etsy.com/shop/mintprintables

post signature

Wednesday, October 14, 2015

New in my shop!

Hi, everyone!!!  I wanted to share some new certificates available in my shop!! Enter code BLOGGER for $2.00 off!


post signature

Monday, October 5, 2015

Thomas the Train Party!

I can't believe my little boy is 5 today!!!!!!  We had a busy weekend of celebrating his birthday, as well as my niece's (where I made an appearance as Cinderella!!!)!


The decorations were my little attempt at a Pinterest-decorated Thomas party....and were probably more stress and exhaustion than they were worth!!!!  I know I saved a lot of money creating tags, labels, a banner, and even a wreath myself, but it was hours of work.  I think next year, we'll just go to Sky Zone!!!! We borrowed a bounce house to use that day, but it was cold and rainy, so that plan got nixed.


Mason has sooooo many trains and accessories, so it made decorating almost free!!


I got both a cake and cupcakes to add some color to the table.  The goody bags had train tattoos, Thomas stickers, a Thomas stamper, the BINGO game, Thomas candy melts that I made with a mold I got last year on Ebay, and some misc candy/snacks. I made the labels in Photoshop.


I got the little bins from Dollar Tree and glued on sandwich cookies with a hot glue gun.  

This was my beginner's-level attempt at a mesh wreath!!  You can't see if from the photo, but there are little Thomas & Friends trains attached!

I love an excuse to get out my popcorn machine!!!!!! 

Drinks were just water and juice pouches. This table was also for the gifts. 

I put a train cutout sticker (cut on my Cricut) on mini canvases and the kids colored over them with markers.  Then when they removed the sticker, there was a little white train!


I also made a Thomas mini BINGO game for the kids to play!!! Email me if you'd like the file! 

It was a wonderful party and the kids had fun just playing around in our basement! I wish the weather had been better for the bounce house and outdoor activities, but that was out of my control!!  Next year;)

:)Jamie


post signature